
This lower-carb version of lasagna is not only vegetarian, but also packs in plenty of hidden vegetables and protein! With bursts of cheese and tomato sauce in every bite, you won't miss the meat or the pasta!

For me, lasagna is one of those go-to recipes when I don't know what to cook. Its cheesy, comforting, and gets me excited for dinner time.
When I started making my lasagna with zucchini instead of pasta, I decided I would never go back. Zucchini lasagna is in a league of its own.
Keep in mind that I am not usually a fan of zoodles or spiralized zucchini in replace of spaghetti. This is different. Unlike zoodles, zucchini lasagna noodles are sliced thinly, and coated and cooked directly in that creamy cheese and garlicky tomato sauce as opposed to thick bites of barely-cooked zucchini with a thin sauce that slips right off. Nope, these zucchini lasagna noodles are not having any of that flavorlessness. 😏

So not only does lasagna made from zucchini taste superior to pasta, but it also is lighter and leaves you feeling better about your meal. With this dish, you can be sure you're treating your body well.
It's not only lighter from the pasta swap. There is also no fat from meat and significantly less fat from cheese.
Fat free cheese tastes almost exactly like regular cheese, and when paired with full-fat cheese, no one can tell the difference. There is also a sneaky swap of ricotta to plain nonfat greek yogurt...😏
Plain nonfat greek yogurt is super creamy and (obviously) fat free. It also packs in a ton of protein and healthy cultures!
This recipe has no meat but that doesn't mean it's lacking in protein. There are plenty of vegetable sources of protein in this meal!
Corn, spinach, mushrooms, and zucchini all are packed with protein, along with small amounts in onion. And don't forget the protein in the greek yogurt!😉
Vegetables are also so much easier to prepare than chicken, turkey, or beef. They cook much faster, have more flavor, and you don't have to worry about under or overcooking it.

How to make the best vegetarian zucchini lasagna
I'll admit, making this recipe wasn't a piece of cake the first time, mostly because I wasn't completely sure how to do things (especially how to successfully peel zucchini). Now that I figured it out, I can make it so much faster and easier! Here's the steps on how to make this.
First step is peeling the zucchini. This must be done using a peeler to achieve the thinnest strips, not a knife or a mandoline.
One of the most challenging parts I found with peeling zucchini was keeping it in one full strip without breaking, especially when I got to the middle with the seeds.
This is the best and easiest way that I found to do it: Start on any side and peel and discard the first 2-3 layers; these are just skin. The first lasagna strip to use should be mostly white on the inside, not too green. Set the lasagna strips on a paper towel and sprinkle with salt. Pat the zucchini completely dry. Zucchini contains a lot of moisture and will make the sauce very runny, so it is important to make sure you get as much liquid out as you can.
After peeling a few strips, you will start to reach the middle of the zucchini with the seeds and it won't peel as easily. Once you get to the point where it breaks when your try and peel it, it's time to change sides.
Flip the zucchini on the opposite side so that the side you just peeled is faced down. Now start peeling on the opposite side! It's the same as before. Discard the first 2-3 layers until you see white. Salt and pat dry. But again, you will reach the seeds.
Now flip it on its side and start peeling from there, with the same steps. This time, it will take you all the way through to the opposite end, so you don't have to repeat on the third side.
So in total, you are peeling from 3 sides, and this will get you the best thin and complete layers. Now just repeat it 3 more times!😂
The next step is to prepare the tomato sauce. Instead of using ground meat, the base and foundation of this scrumptious sauce is vegetables!
I'm talking onions, mushrooms, spinach, arugula, corn, and of course, garlic, all caramelized and juicy, ready to hold up the sauce.🤤
After they're all caramelized, add in just a hint of salt along with freshly ground black pepper, italian seasoning, dried oregano, and my favorite: garlic herb seasoning!
It is important to build layers of flavor and not just season at the end. This way, each individual component will have the perfect amount of seasoning.
Then, add in the low-sodium marinara sauce. I say low-sodium for two main reasons. One, of course, I'm sure everyone knows, is that excess sodium is harmful to your health. You'd be surprised by how much sodium some companies put in...😳The second reason is just the taste. One time I tried a mix of low-sodium and regular and it was way too salty. For this recipe at least, stick to the low-sodium.😉
To finish off the sauce, stir in some grated parmesan. You can freshly grate your own block of cheese if that's your thing, but for me I find it much easier and cheaper to just get it from a package. The parmesan incorporates that hint of cheesy flavor that just pairs perfectly with tomatoes, and thickens the sauce ever so slightly.
Once I finished making this sauce for the first time, I just stared at it while mixing it around for a good 5 minutes because it looked so beautiful.😂 The proportions of vegetables to sauce is just perfect and let me tell you, it tastes even better than it looks.
Now on to the last component and perhaps my favorite: the cheese! It's fairly simple but not exactly your traditional ricotta filling.
As I said before, greek yogurt is used instead of ricotta, along with fat free mozarella and an egg to bind it. Simply mix it all together and you have your cheese mixture!
Once all the components are done, it's time to layer!
Start with a thin layer of the tomato sauce on the bottom and layer zucchini noodles on top in the same direction.

Then, spread on some of the cheese/yogurt mixture on top and sprinkle about a tablespoon of grated parmesan on top.
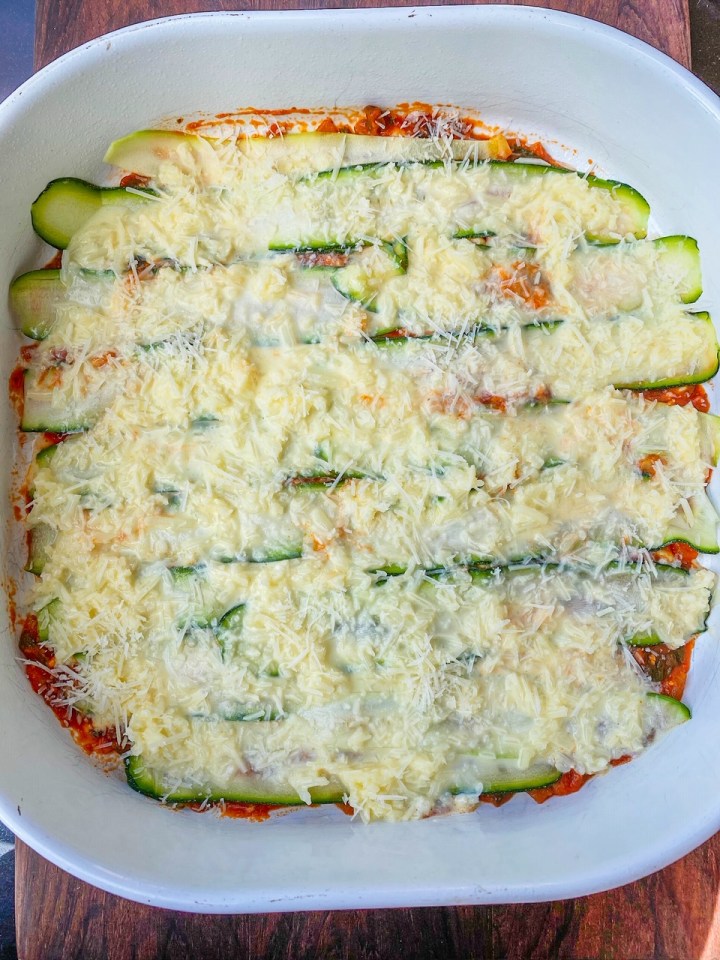
Spread another layer of tomato sauce on top of that. Keep repeating these layers until all the ingredients are used. Finish with a sprinkling of the remaining mozzarella and parmesan on top and bake!

And there you have it! Cheesy, garlicky, tomato-y goodness you can feel amazing about eating. And don't forget to post a picture to Instagram and tag me @nutritiousdelights - I'd love to see it!❤️

Vegetarian Zucchini Lasagna
Ingredients
- 4 large zucchini
- 2 tablespoons olive oil
- 1 medium white onion
- 2 cups chopped mushrooms
- 2 cups chopped spinach
- 1 cup chopped arugula
- ¾ cup frozen corn
- 1 teaspoon salt divided
- ½ teaspoon pepper
- 1 teaspoon garlic herb seasoning
- 1 teaspoon italian seasoning
- ½ teaspoon dried oregano
- 3 cloves garlic minced
- 3 cups low sodium marinara sauce
- ½ cup shredded parmesan divided
- 1 ½ cup fat free shredded mozarella
- ⅓ cup plain nonfat greek yogurt
- 1 egg
Instructions
- Using a peeler, peel the zucchini into thin strips (lengthwise). Sprinkle with salt, pat dry and set aside.
- In a medium-large pan, heat olive oil on high heat. Add in onions and cook until translucent, about 1-2 minutes. Add in the mushrooms and cook for another 2 minutes. Add in the spinach and arugula and cook for an additional minute or two until wilted. Add in the garlic. Stir in the remaining salt, pepper, garlic herb seasoning, italian seasoning, and oregano. Add in the frozen corn. Pour in the marinara sauce and stir to combine. Lower the heat to medium and stir in a quarter cup of the parmesan. Cook for about 3 minutes, then turn off the heat.
- Preheat oven to 375 degrees Fahrenheit and prepare a 9"x 9" casserole dish.
- In a small bowl, combine greek yogurt, egg, and 1 ¼ cup of the mozarella.
- Time to layer! Start with a thin layer of sauce, then layer on some zucchini in the same direction. Spread on some of the cheese/yogurt mixture and sprinkle about a tablespoon of parmesan. Keep repeating these layers until the ingredients are all used up. Top with the remaining mozarella and parmesan.
- Bake for 20 min covered, then 5 minutes uncovered. Enjoy!
Carolyn M
Hi! Just discovered your blog! Your recipes and pictures look great😍
Bibi
Looks great! Can’t wait to try it!!